Forward Motion 411
Search
  • Making College Count
    • Getting In
    • Campus Life
    • Getting Ahead
    • So You're Graduating...
    • Graduate Life
  • Life Coaching/ Motivation
    • Removing Roadblocks
    • Life Coaching
  • The Home Front
    • Recipes
    • Organize Your Life
    • Holistic Health
    • Fitness
    • Crafts and Hacks
    • Baby Time
    • Trollolol
  • Mediation
    • Mediation FAQs
    • Family Conflict
    • Corporate Conflict
    • Post-Divorce Survival Guide
  • Finances and Credit
    • Personal Finances
    • Your Good Credit
  • Contact Page
  • Contracted Services
  • The Shoppe

How To Temper Chocolate

11/20/2013

0 Comments

 
Temper Chocolate to Avoid Bloom
Nothing tastes better than your favorite treat covered in a high quality chocolate.  Nothing is more fun than getting together with some friends or family for a chocolate fest as a pre-holiday kickoff! You need to temper your Premium and Couverture chocolate as this will make it easier to work with and help you avoid those unsightly gray spots called bloom. If you don't know where to buy high quality chocolate click here and go to the bottom of the page. May your holidays be filled with love, laughter, and chocolate! 

Items You Need To Temper Chocolate:
1    Double Boiler
1    Silicon Spatula or dedicated wooden spoon
1    Candy Thermometer
1 lb Premium or Couverture Chocolate – chopped into small pieces and divided:
                                 ¼ in one bowl, and 
                                 ¾ in another bowl
        (Put all of the tiniest pieces in the ¼  bowl - this is your seed chocolate*.) 

Pour 1-2 inches of water in the bottom pan of the double boiler and place double boiler pan on top of it.  Use medium heat to slightly warm the double boiler and add the ¾ bowl of chocolate. Turn heat low enough to keep the water in the bottom pan simmering but do not let it boil - boiling water will put you at risk of getting water in your chocolate. Stir constantly until the chocolate is melted, smooth, and has reached the correct temperature (118° for dark; 112° for milk).  

Remove the top of the double boiler from the lower pan and wipe the moisture from the bottom of the double boiler. Add the remaining ¼ bowl of chocolate into the melted chocolate and continue stirring constantly until the chocolate has cooled to 89° for dark or 86° for milk chocolate.   Now your chocolate is tempered and ready for dipping!

*Adding the seed chocolate during the cooling down process helps to bring the fat molecules back into alignment to avoid bloom. If you are using the Premium pellets, grate or crush the 1/4 chocolate.

0 Comments

Tempering Fine Chocolate: Know Your Chocolate

11/19/2013

0 Comments

 
Temper Your Premium Chocolate
Dipping chocolates can be a lot of fun but if they’re ugly after they set, it’s disappointing. I got together with my friend, Ruth, one autumn afternoon so she could share her chocolate tempering expertise with us. You see, chocolate can be tricky. Your goal is to have chocolates with a shine because they’re appealing. Chocolate with a bloom (that dusty, ghostly look) still tastes delicious, it just doesn’t make a pretty presentation.  When you reshape (i.e., melt) chocolate, you’re forcing the fat molecules out of alignment; the tempering process will realign them.  It sounds so technical. But guess what?  It’s relatively easy!  And once that chocolate is tempered, you can make all sorts of delightful treats. That afternoon we made cherry chocolates, almond clusters, and peanut clusters. There's a reason chocolate dipping becomes a big deal in the Fall; Christmas is right around the corner!

Chocolate Comes is Various Grades. Not all chocolate is alike (or even chocolate for that matter). A lot of people get confused about this when starting out so here is a list of common grades of chocolate:
  • Melty’s:  These are the chocolates you can find in the craft store. They make great molded chocolate treats! However, they aren’t really chocolate because they typically lack Cocoa Butter, Cocoa Powder, and Cocoa Liquor.   It isn’t really chocolate, so you don’t have to temper it.
  • Chocolate Chips:  These are the drops of chocolate sold in every grocery store. They’re fabulous in baked goods, like cookies, because they do well in high temperatures.  A high concentrate of vegetable fats replace the Cocoa Butter that is used to make high quality chocolates: making them inexpensive and able to take those high baking temperatures.
  • Baker’s Chocolate and Baking Bars: Again, you can find these in your grocery store (probably in the baking aisle).  They are fabulous for baking and because they lack Cocoa Butter you can expose the chocolate to high heat and still get excellent results in baked goods.  They aren’t good for making custom confections and, truth be told, they’re quite expensive! When you calculate the per pound cost it is usually over $12/lb. No tempering necessary.
  • Candy Bar:  This favorite treat can be found in grocery stores also. However, the quality is inferior and the price is very high compared to the per pound price of Premium Chocolate.
  • Premium Chocolate:  Honestly, this chocolate is superior to the aforementioned chocolates for dipping and general candy making. These chocolates are found in specialty stores and you can also purchase them online. They contain the required ingredients of cocoa butter, Cocoa Powder, and Cocoa Liquor and are manufactured in 10 lb. slabs and pellets.  The pellets get confusing because many people confuse them with the Melty’s pellets mentioned above so you have to pay attention when making your purchases.  Popular brands of Premium Chocolate include Guittard, Merckens, Peters (made by the Nestlé company), and Ghiradelli. This chocolate typically costs between $4.50-$15.00/lb. It’s the chocolate you will learn to temper and use to make specialty confections in the next few days as you follow our website
  • Couverture:  This is the gold standard for chocolate. It contains high percentages of cocoa butter (32%-39%) and Cocoa Liquor (as high as 70%) that give it its rich, distinctive taste as well as its low melting point.  Couverture chocolate is largely available online and the popular brands are Valrhona, Callebaut, Veliche, and Sharfen Berger. They are expensive, ranging from $8 - $15/lb and well worth every penny to the true chocolate connoisseur.  The word, Couverture, means covering in French and is used for dipping some of the best chocolate confections made.  You would temper this chocolate just as you would the Premium Chocolate.      
A Few Good Things to Know

  1. Water is the enemy of chocolate. Even one drop of water getting into your melted chocolate can cause it to seize (i.e., it’s ruined). Never put a lid on a pan of melting chocolate to hasten the process because the steam hits the lid of the pan and becomes (you guessed it) water; that drip onto your chocolate. 
  2. Double Boilers are the best friends of chocolate. You need one. You can rig one up with a metal bowl set over a pan filled with 2 inches of water but the double boiler is will make your tempering less risky.
  3. Chocolate comes in two basic forms: dark and milk.  If you are tempering dark chocolate, your temperature goal is 118°F (48C).  If you are tempering milk chocolate, your temperature goal is 112° (45C).  We won’t even get into white chocolate as it must be handled differently.
  4. Obtaining Premium or Couverture chocolate is completely worth the money when making confections. What’s the difference?  Remember true chocolate will be made of cocoa butter (as opposed to some other type of fat), cocoa powder, and cocoa liquor.    
  5. You want either want a silicon spatula or a dedicated wooden spoon to use when tempering your chocolate. Metal spoons conduct heat and are not recommended. What is a dedicated wooden spoon? It’s one that has never touched any other type of food. The wood can pick up flavors from other foods so purchasing a wooden spoon that will be used only for chocolate tempering is a good idea.

Tomorrow: Tempering Your Chocolate


0 Comments

Cilantro Lime Chicken

10/22/2013

0 Comments

 
Picture
It’s been a busy day; you’re tired and looking forward to a nice, relaxing evening. Dinner?  You aren’t sure, but you’re thinking leftovers might be the order of the day until you get that phone call. It might be your kids planning to stop by for dinner or a dear friend you haven’t seen for a while, but suddenly those leftovers aren’t going to make the cut. What should you make for dinner?  Make Cilantro Lime Chicken and serve it with gnocchi, couscous (my favorite), or pasta and everyone will think you are a kitchen goddess extraordinaire. 

If you ever have leftovers from this meal: This chicken is better than the chicken served at Cafe Rio! Roll it into a fresh tortilla along with some refried beans and some Spanish Rice for a yummy burrito. 

Cilantro Lime Chicken

4              Boneless Chicken Breasts (or the equivalent amount of chicken tenders)
                Olive Oil
5 cloves   Garlic (minced)
                Chili Powder
                Cumin
1/8  C      Lime Juice
¼  C        Snipped Cilantro
1              Avocado (optional)

Cover the bottom of a frying pan (medium heat) with thin layer of olive oil. Wait until the oil is very hot and place chicken in the hot oil. Cover chicken with Chili Powder and Cumin. Let it cook undisturbed until it is nicely browned on the bottom and the chicken appears to be cooked about halfway through.  Turn the chicken and sprinkle the garlic over the chicken. Let the chicken continue cooking until it is completely done. Add the lime juice and scrape up the browned goodness from the bottom of the pan. Stir the chicken into the lime mixture for a minute or two.  Remove the chicken to a serving plate and sprinkle with cilantro. Garnish dish with sliced avocado.

0 Comments

Vanilla Extract

10/10/2013

0 Comments

 
Picture
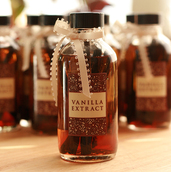
The sweet and cozy scent of vanilla brings back a multitude of memories. Of course, baking and Christmas come immediately to mind. As does the shock of my first taste of vanilla (taken, of course, on the sly) because I couldn't believe that anything smelling that delicious could taste so bad. Making vanilla is a gift to yourself as you watch the liquid deepen; knowing what the end result can be. And it can also be a pretty fun gift to make for friends and family for any special occasion. It takes about two months to get vanilla to its richest state so if you want to take your friends a gift of vanilla or just use it at home for that special holiday baking, you need to get started soon! 


Vanilla Extract

2 Vanilla Beans
1/2 C Vodka (or Ever Clear)

The higher the alcohol content in the Vodka, the better the extraction so purchase a Vodka that is 100 proof or better. You can also use Everclear for maximum extraction. 

Cut each vanilla bean in half and then split each one length-wise to maximize exposure to the beans nesting inside. Slide into bottle. Warm the alcohol to 140° and cover beans. Place the lid on the bottle and let set for approximately 6 weeks - shaking it occasionally. There is no need to open the bottle until after the 6 week period. 


At this point, you can remove the vanilla beans (if you want) and enjoy your own high quality vanilla!


0 Comments

Banana Bread

9/28/2013

0 Comments

 
Picture
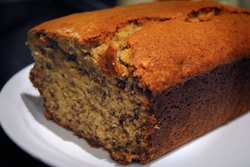
Have you ever lost a recipe? I lost this one last year and it drove me crazy! I looked everywhere. I went through all of my cookbooks, tore apart my recipe drawer, and even looked in a couple of extra cabinets. Then I employed the help of my children who went through the same process and yet we all came up with nothing but sad faces.

We sat down and went through oodles of recipes for banana bread trying to find the original. We tried a few that looked similar but the bread never quite matched our expectations. We wanted a banana bread with full flavor, cake-like moistness, and a to die for aroma.  We admitted defeat and decided to simply use one of the inferior recipes that was, well, close. I was surprised to realize - six months later - that we just never made banana bread again. I racked my brain trying to remember the source of this fabulous recipe and this morning I realized I'd gotten the recipe from my sister, Vickie!  I had this epiphany as I was searching for another recipe. Different recipe same process but guess what?!?!   I found my banana bread recipe!  And I decided to share it with you because this bread is that good.

Banana Bread 
Cream together:
                 1/2 C Shortening
                  1   C Brown Sugar
                 1/2 C Granulated Sugar
                 1/2  t  Vanilla
                 1/2  t  Almond Extract

Add and mix well:
                    2     Beaten Eggs
                    3     Smashed Bananas
                    1 C  Milk

Blend in:
                   3  C  Flour
                   1   t  Baking Soda
                  1/2 t  Salt
                  1/2 C Sliced Almonds 

Bake:
                  In greased and floured bread pans @350° for 50 minutes (or until toothpick comes out clean)

0 Comments

Jen's Chicken

8/23/2013

0 Comments

 
Picture
My friend, Jen, has a heart of gold and a flair for making delicious and simple meals. If you know her, it's no surprise to find one of her recipes posted here. I asked for this recipe after getting just a whiff of the actual dish one afternoon. The dish is easy to make and tastes just as good as a leftover as it does fresh.  Serve with fresh, steamed broccoli or asparagus for a delicious meal.


Jen's Chicken

4-6       Chicken Breasts (you can leave these whole or cut them into strips - whichever you prefer)
1 Stick  Butter
1 pkg    Italian Seasoning
1 Can   Cream of Chicken Soup
8 oz     Unwhipped cream cheese

Melt butter in fry pan.  Mix in Italian Seasoning and add chicken to brown. Remove chicken and set aside. Add soup and cream cheese to pan and stir until the cream cheese blends into mixture.  Add hot water to desired thickness and add browned chicken.  Simmer, covered, over medium heat until chicken is done.   Serve over rice or pasta. 

0 Comments

Cinnabon Cake

8/15/2013

0 Comments

 
Picture
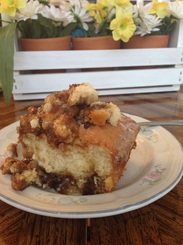
This cake will make you fat. This cake will make you happy. I know people tell you you can't have it all and that you shouldn't eat food that makes you fat and happy. I say, you need to make an exception on occasion and this is that occasion. This cake will remind you of Cinnabons - but it's big enough to share with your favorite people (unlike Cinnabons). Or you can make it when everyone is gone, and eat it all yourself. When they come home and realize what you've done, they will hate you - and you won't care because you will still be fat and happy. Just don't do this every day because corpulent and happy is rarely a good thing.

Cinnabon Cake
In a medium-sized mixing bowl, mix Batter:
3  c    Flour
1  c    Sugar
4   t    Baking Powder
¼  t    Salt
1   c   Milk
2        Eggs
1   T   Vanilla
4   T   Melted Butter (stir in after you mix up the rest)

Pour into a buttered (grease or Pam are okay but not as tasty) 8"X11"pan and set aside.

In a small bowl, mix:
2  Sq  Softened Butter (do not use margarine)
1   c   Brown Sugar
2   T   Flour
1   T   Cinnamon
½   c   Raisins

Distribute evenly over batter dropping with a tablespoon. Use a knife to swirl through the batter – it will be lumpy and that is fine.

                                                                             Bake at 350° for 40 minutes or longer (until golden brown). 

While the cake is baking, mix Glaze:
2  c  Powdered Sugar
5  T  Milk
1  t   Vanilla

Whisk in medium sized bowl until smooth. Drizzle over warm cake. 

Best served warm.


0 Comments

Baked Macaroni and Cheese

6/13/2013

0 Comments

 
Picture
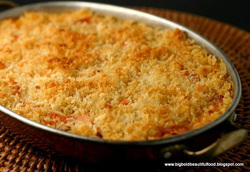
This is one of my favorite recipes. Jake actually discovered it and made if for our family one night when we suggested making old fashioned macaroni and cheese. You know: boil water, add macaroni, drain, add cheese and a little bit of milk, stir until melted,and serve. We really loved the old fashioned mac & cheese, but Jake's version excelled in every way. The confluence of textures is amazing - the creamy sauce, the chewy pasta, and the crunchy topping make your dinner a heavenly ordeal. 


Ingredients:
8 oz.   Uncooked Pasta Shells 
2 C     Grated Cheddar Cheese
1/2 C  Finely Grated Parmesan Cheese
3 C     Milk
1/4 C  Butter 
2½ T   Flour

For the topping:
2 T     Butter (do not use margarine)
1/2 C  Bread Crumbs

Directions:
1. Cook the pasta shells and then drain them. Set aside

2. In a saucepan (double boiler would be best), melt butter over medium heat. Stir in enough flour to make a roux. Slowly add milk to roux, stirring constantly. Stir in cheeses and cook over low heat until cheese is melted and the sauce is a little thick. Put pasta in a large casserole dish and pour the sauce over macaroni. Stir well.

3. Melt butter or margarine in a skillet over medium heat. Add breadcrumbs and brown. Spread over the macaroni and cheese to cover.

                                                                                                                               Bake at 350 degrees for 30 minutes                                  
                                                                                                                                                                     Serves 4-6

0 Comments

Pasta e Fagioli Soup (Olive Garden Recipe)

6/5/2013

0 Comments

 
Picture
Whenever I eat at the Olive Garden I have to order the Pasta e Fagioli soup. It is just the right amount of spicy in a rich tomato broth. I love it! This soup is always a hit at parties, at potluck dinners, and at home when you need a cozy, healthy meal.  Why does the Olive Garden share their recipes? No one knows for sure, but I'm betting that they're betting that you'll appreciate the work they put in to serving you a fresh meal whenever you visit them has something to do with it.  So the next time you want to eat in and make it special, whip up a batch of this soup and some cheesy Parmesan Bread Sticks and enjoy your private Italian paradise.  Divertiti!

Pasta e Fagioli Soup

1  C          Great Northern White Beans
1   rib        Celery, chopped
1              Carrot, chopped
2  cloves   Garlic, minced
20  oz       Beef Broth (avoid using bouillon if possible)
28  oz       Canned, Diced Tomatoes
1.5 lbs      Ground Italian Sausage
1              Yellow Onion, minced
1 t.           Dried Basil
¼ t.          Dried Marjoram
¼ t.          Cayenne
¼ t.          Hot Pepper Sauce
2  C.        Water
1  C.        Ditaloni (you can also use Elbow Macaroni)

Boil beans in lightly salted water until soft. Drain and discard the water.  Set aside. (If you are short on time, you can use a can of Great Northern White Beans and just drain the juice before adding them to the soup.)

Crumble and fry the Italian sausage. Combine beans, sausage, and all other ingredients except the pasta in a large soup pot.  Simmer on low heat for 6-8 hours (to let the flavors blend).

15 minutes prior to serving, add the uncooked Ditaloni. Continue simmering for 15 minutes.

Serve with freshly grated mozzarella.

                                                                                                                                             Serves 10 generous servings


0 Comments

Spinach and Strawberry Salad

5/31/2013

0 Comments

 
Picture
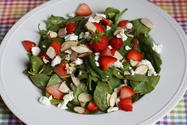
This summer salad is great to take to gatherings of friends and family. People who typically don't eat spinach will come back for more once they taste the unique mix of spinach, strawberries, nuts, and feta cheese. The raspberry vinaigrette simply adds delight to the mix. Sounds sappy but wait until you taste this salad!


Mix In a Small Bowl:
  • 1 clove garlic, finely chopped
  • 2 t raspberry vinegar
  • 2 T extra virgin olive oil

Set aside.

Mix in a Large Bowl:
  • 1/2 pound baby spinach
  • 1 cup strawberries, thinly sliced
  • 1/3 cup sliced almonds, toasted
  • 2 oz feta cheese, crumbled

Refrigerate.

When you are ready to eat, gently toss the raspberry vinaigrette with the salad and serve. 


                                                                                                                                                       Serves 4

0 Comments
<<Previous
Forward>>

    Recipes

    All
    Alfredo Sauce (Olive Garden)
    Apple Dumplings
    Applesauce
    Baked Chicken With Sweet And Sour Sauce
    Baked Mac & Cheese
    Banana Bread
    Berry Cobbler
    Chicken Broth
    Chicken Tortilla Bake
    Cilantro Lime Chicken
    Cilantro Roasted Salmon
    Cinnabon Cake
    Cinnamon Twists
    Corn Fritters
    Desserts
    Eggnog
    German Lace Cookies
    Homemade Tortillas
    Know Your Chocolate
    Oatmeal Cookies With Raisins And Chocolate Chips
    Parmesan Bread Sticks
    Peppermint Patties
    Potato Salad
    Pulled Pork Barbacoa
    Pumpkin Bread
    Rice Pudding
    Salmon Patties
    Soups
    Spinach And Strawberry Salad
    Temper Chocolate
    Tomato Soup
    Ultimate Soup
    Vanilla Extract

    RSS Feed

    Subscribe to our newsletter